Monday, March 29, 2010

Birdies Singin’

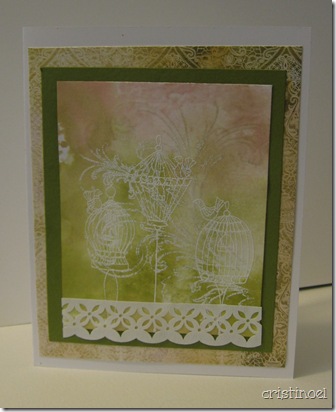
I think of an enclosed patio filled with ferns, a ficus  tree or two and white Victorian wicker furniture with this little stamped image. The stamp is Impression Obsession’s Birdcages stamp. It shows up better if you click on the photo and get the larger view.

 card_birdies001

I was trying this out to see if I was going to  like it the way I had it in my head. Sometimes those things don’t turn out so good and other times they turn out wonderfully better than expected. So I was using a scrap of Neenah paper and  that wonderful flourish stamp of Time Holtz’s with old paper distress ink and so far so good. The next step was to add the little birdcages that delights me much. And these were going to be stamped and embossed with white embossing powder. So I got out the trusty heat gun and dried the distress ink (or so I thought) and proceeded. Well when i added the embossing powder I noticed that some of the flourish had picked up some of the embossing powder. I applied the heat gun to it anyway and kinda liked what i had on the paper. So then I went ahead and lightly smashed it face down into a bath of distress inks (shabby shutters and tattered roses) and this is what came out.

Neenah paper doesn’t do so well this way but water color paper has a bit of a raised grain to it and when stamping images sometimes ends up with gaps where ink should be. So I went ahead with the Neenah paper and dried it immediately. It didn’t turn out too badly.

This went really well with a piece of Prism Cardstock in Sring Willow Dark and put this on a piece of paper from the Porcelain Collection of basic grey’s. The fancy lattice border is a Silhouette file cut on Dick Blick sulphite drawing paper.
Saturday, March 27, 2010

Silhouette Tip

I have some cutting files now that are the basic shapes used in making cards (circles, squares, and ovals; plain and fancy) and this is presenting a bit of a problem as to which one to use with whatever stamp I am using at the time. So…i thought, why not cut a sample size for matching to a stamp, that I should make a set of these and then i can try them behind the stamp to make sure that i have the right size shape for the stamp.

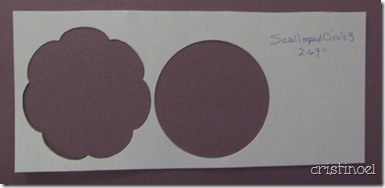
tmplt_size_1107

I also have the mat for this circle that fits perfectly. Then I marked them with the size and file name. Then after cutting out the shape i realize i could use this negative shape for doing the same thing for paper mats that go behind  the decorative stamped shapes.

tmplt_sizenegative_1107

I could move it around on the decorative paper to find the right spot on the  decorative paper before cutting. I also decided to save a sample with the file name on it so that I got the right file the first time with minimum searching for it. The paper I found to be just great for this is Blick’s 60 or 80 lb sulphite drawing paper. It has a very nice crisp strong feel to it and cuts just fine. This would also work out for trying out designs as it is very inexpensive paper.

I also try to make the file name fit the shape and size of the shape being cut. There is also the Thumbnail browser To see what is in each file which comes in very handy.

Wednesday, March 24, 2010

Need a Hug?

No matter what you are going through, maybe you are needing a hug today. Here is one for you from me. I can make that many cards and mail them out to you but you can save the photo and remember every time you look at it that God has a hug for you.
card_hug1098_edited-1
I learned a couple of things this morning. The first is my lovely Canon MP210 (printer) has a setting that can speed up or slow down the drying time of the ink. that makes it nice for embossing digi-stamps.
The other one is really a no-brainer but i messed up. I printed the sentiment onto sticker paper (Avery 4383) and besides the fact that i should have made it a little bit smaller I cut to shape and i should have just pressed it onto the white layer of the tag and trimmed to match the tag.  Instead i shape cut it ( ;) )and the edges are showing, but it isn’t too bad. I did a neat little trick of 2 layers on the ‘hug?’ the bottom layer is gold with an upper layer sized just a little smaller and in colors to match the paper.

Materials

Card size is 4 1/4 x 5 1/2 inches. the Shape for the images (with mat cut a little larger) I cut on the silhouette from a shape scanned then imported onto the Robo Master software and then an outline was made from that. After the outline was pasted onto the image I un-grouped it and deleted the background image. I cut the white layer at 2 5/8”  and the mat at 2 7/8”.
The sentiment tag is an SEI file (nameplates_C00011_27011 – keyword: tags, nameplate, label) Silhouette file of 4.
The scroll is a pair of scrolls (rough_swashes_C00138_23067 – keyword: flourish) not joined, done by hero Arts for Silhouette
The leaf stem is branch (branch_C00022_23851 – keyword: leaves) by Donna Downey and would be great for Sunflowers. I cut mine just a smidgeon over 2 inches long or tall on some Dick Blick student drawing paper and did a Tim Holtz technique for coloring with peeled paint Distress Ink. I was trying for a mottled look and did get it on one branch but not this one.
The flower centre is Puffy Velvet and i painted it yellow with water color pencils and used just pain water (I didn’t know how it would react to the dove blending solution)

Friday, March 12, 2010

embellishing

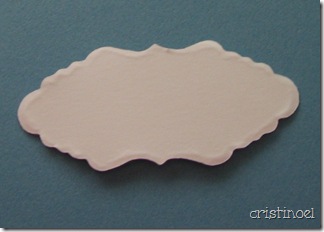
this little trick will make your silhouette cut labels look a little ‘nicer’. I have an old Letraset burnisher for that i put to use for this. turning the flat shape over, laid it on a washcloth and running the burnisher around the edges I now have a raised edge to my flat shape

label_silhouette-embssd 007My burnisher looks like this:

burnisher-1

I cannot afford one of those delightful little ‘machines’ that use the $25.00 dies. So when Silhouette came up with an offer for time payment I really jumped. I paid more for the machine and it will not do the embossing so i can do it this way and it looks just as good if not better.

And then, I went and did this little project. I don’t know how I will use this yet, but it is not going to be a card.

penyblkkitty-2

It would make a cute little album cover maybe….

Friday, March 5, 2010

Birthday

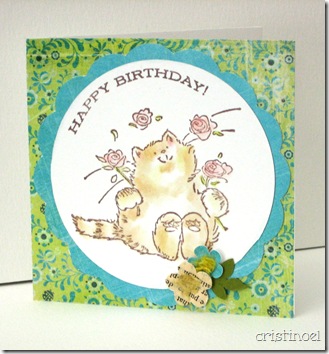
My daughter is having her birthday in a few days and so i made up this little card.

happybirthdy-2sm

…and, just for the fun of it, since Paper Gardens Project is having their birthday i can enter this into the challenge. So, Happy Birthday Paper Gardens and Cathy.

Recipe
  1. Stamp – Penny Black’s Piece of my Heart stamps set birthday sentiment from the Flourishes  Sweet Violet stamp set
  2. Paper – Basic Grey’s Urban Prairie 6x6-inch pad and Neenah Solar White
  3. handmade flowers
  4. Dove Blender and water colors pencils Faber-Castell’s Albrecht Dürer in the following colors
  5. Dk Naples Ochre #184 undertones cat & optional
  6. Burnt Ochre #187 - cat
  7. Dk Flesh #130 - roses
  8. May Green # 170 – leaves

Paper Gardens carries water color pencils also they are right here

Tuesday, March 2, 2010

2 challenges

This is a new one to me….entering 2 challenges. Even entering a  challenge is new this year for me. Challenges are fun ways to spark your creativity and to share new ideas however large or small they may be. And since getting my latest paper pad (Basic Grey’s Porcelain) i was ready for doing something.

I ran across this TESC102 challenge after messing up a card for Paper Garden's challenge so now i will enter this one.

aaahhhspring-1sm

For the image I used Inkadinkado’s Nostalgia clear stamp set With 2 shades of pink and 1 green chalk ink pads. I won’t give the color names as 2 of them are discontinued (at least from 1 supplier) colors and it really doesn’t matter as long as the color are compatible with each other and the paper. And i used a scrap of white cardstock, so i do not know which one i used for sure, however it works so…..

Then i took that scrap and cut out 1 of the labels from the  Cosmo Cricket’s journaling label set (journaling_boxes_C00048_26102) for the Silhouette. I did trim the end to fit into the design and added a strip of the lace from one of the sheets in the pad in place of the bling.

I was really nervy on this little scrap. Usually it is best to have the paper wide enough to fit under the 2 ’feet’ on the roller bar, but i didn’t do that this time. I just lined it up with the edge, pressed the paper down (making sure that it was sticking appropriately), and let the machine cut the label. What i didn’t realize is that this particular label set uses the pencils to do the inside line so my label has two line of cutting.