Wednesday, February 24, 2010

Flowers on Silhouette

I love those little flowers that help add something to a card. And i saw some by prima that i wanted really bad but couldn’t afford. So i did my own!
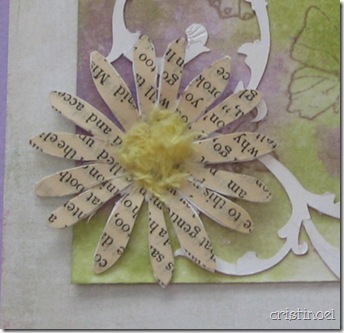
butterflymornign_det_d-2I took a sheet of lighter than 80 lb. card stock and some Paper Plus Decoupage Finish and used the handy scraper tool (like Tim Holtz’s) to spread the decoupage glue over the cardstock and then placed a piece of paper from a Godey’s Ladie’s Magazine on top smoothing into place before laying books on top to dry. I hope somebody out there will not be too upset with me. I only used a page from a silly story (they were almost all too silly) and the print is very small. The flower is just a smidge over 1 1/2 inches diameter. The petals (i drew 3 and copied and pasted them around, rotating to fit nicely) were just placed around an imaginary center over which a circle was placed to from the flower center and these were joined. Then i noticed a couple of overlapping petals not covered by the center so i took another little circle and joined that to the flower over those cuts so they would disappear.
It was trial and error as the first one i did did not cut all the way through. The next time I put on all the ‘stops’ i could. I set the paper for 100 lb. tag, used the pink blade spacer, speed at 7 and thickness all the way up to 33.
My flower center was some embroidery thread snipped really fine over Mono Multi glue in the center of the flower.
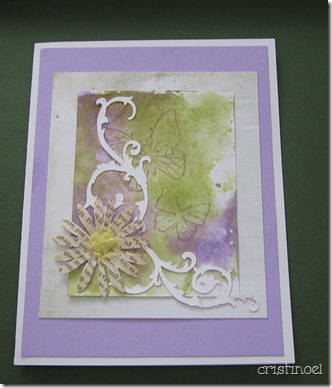
butterflymorning_d-1
the card is finished and looks even nicer than the photo, really. I used Distress inks for the background in dusty concord, milled lavender, peeled paint and shabby shutters on Neenah cardstock. Then I stamped the butterflies in Memento's Rich Cocoa ink, placed  the flourish on this and sprayed a little Tattered Angels Iridescent Gold over that. the flower went on last but could have been included in the gold spray. This was placed onto some white paper from the Bittersweet (6x6) Collection which has very nice green grungy tones and then onto a piece of frosted amethyst Prism Cardstock which is not frosted, it’s just the name for the lighter tone.
The flourish is in the Silhouette online store as well as other flowers. I do have the cutting file that i used for this flower and if anyone wants a copy of the file they can email me and i will send a copy. I can only do .gsd file format at this time.
Have you ever wondered what the coloring is of a real Hedge hog? You can check it out here : http://en.wikipedia.org/wiki/Hedgehog
Just Playin’

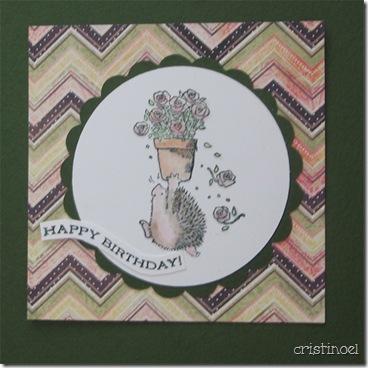
I have a cute little granddaughter having a birthday soon and was working on a card for her – I came up with this….

Hedgie_d-4

Well, things don’t always go just like you want them to – and after doing the little hedgehog and finding the paper i wanted to go with it i think this will do just great for my Son, who also has a birthday soon.

Materials
  • Basic Grey’s Porcelain 6x6 collection
  • Penny Black’s valentine critters
  • Prism green card stock
  • Sentiment from Flourish’s Violet stamp set
  • Neenah Solar Crest 80# cardstock
  • Dove Blender
  • Albrecht Durer Water Color Pencils in the following colors
  • Caput Mortum Violet #169 (for roses)
  • Indian Red, #192 (hedgie’s body)
  • Burnt Umber #280 (hedgie’s quills)
  • Sanguine #188 (flower pot)
  • Permanent Green ( i think) #266, you can use a better green than this was.

Most of these i can be bought at a lot of places, but i find that is is not easy to find Prism Cardstock which I like better than the popular brands which i buy also. And the water color pencils I bought at Dick Blick Art Supplies and they can be bought open stock. They and the Lyra brand are the best water color pencils ever!

When I did the coloring on this little critter, I had just done the green on the flowers and had wiped the blender off. However there was still some green on the pen tip and when I pre-wet the hedge hog for coloring there was a hint of green, then I laid in the color for the hedge hog with Indian Red #192 and I think it looks just fine. Green is a natural toner for reds anyway. And there was so very little green but just enough to shade the red a little and I think that made the hedge hog!

Saturday, February 13, 2010

Valentines Projects

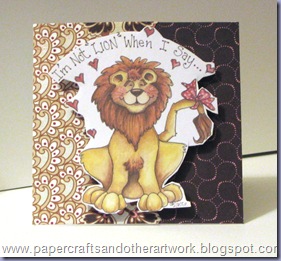
have several little 3x3 cards and bags to show off. If you are in a rush and need something more for Valentines day PC Crafters & D.A.I.S.I.E. Company are two great places to visit. I used graphics from both these places for the following projects as well as Basic Grey’s Bittersweet 6x6 collection which i just love, and Hero Arts “Hero Hues” Layering paper in Snow or Water Color paper.
card 001_sosweet
Since my audience, however small, is not all familiar with making cards, I will give a quick run-through. Base of the card is 80 lb. cardstock cut 3 x 6 inches and scored at 3 inches Then i chose 2 co-ordinating patterns from the Bittersweet collection (any patterned paper may be used though) and used a glue for the purpose of scrapbooking/cardmaking. I like to use the tape runners which is glue laid out on a narrow paper and in a plastic holder so that you can just lay it down on the paper and “run” it the length needed. The second glue is Tobow’s Mono Multi which is the next best. Tombow has a fine point for tiny things and a wide point at the bottom for spreading larger areas quickly. It also works as a permanent or repositionable glue. I measure the decorative papers and cut them to fit the card front and glued them into place.
I stamped the main image on water color paper but other paper can be used, and, thought it doesn’t show here, I used embossing tinsel which is embossing powder with glitter mixed into it. So the design is nice an sparkly. I wish it would show up that way but it is not; sorry. I handwrote the sentiment in mettallic gold to go with the design. After cutting with deckle edged scissors I used 3-d dots to keep the image in place. In years past i have used small pieces of egg carton and glue, now i have the ritzy stuff.
card 007_tweet Card base on this card is the same as the other but orientation is tent fold. Bittersweet Dark red was used for the matting or background for the hear which is a combination fo graphics from 2 different set from PC Crafter’s web site. PC Crafter’s has their own little viewer for their files and when you pay for the file (which has several images and is usually only $4.95usd each) and when you drag the file into your editing program hold down the shift key as you drag and that automatically make the background transparent for layering. Since my very expensive program crashed and I have not been able to repair or replace it I have been using Serif’s Page Plus which you can get fro free and upgrade reasonably. It works rather well for this; i printed out several graphics on the Hero Arts paper and they turned out beautifully. Cut them out and pasted into place. This one is flat on the card, the next one is ‘popped’ up with 3D dots again.
card 006_notlion
The 2 sets of graphics are “My Funny Valentine” and “Flights of Fancy II”
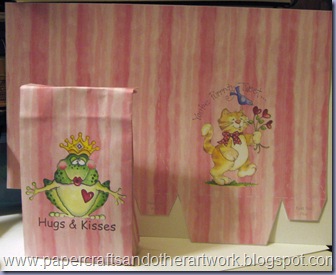
Then from D.A.I.S.I.E. Company I used the little Valentine Treat Sacks and since they gave me a couple of plain bags I placed PC Crafters graphics on them to personalize as I had several to make this came in real nice.
valentine 001_edited
This particular graphic set can be found HERE. The files come as .PDF and .JPG. I just loaded the jpg file and sized it to fit the whole page and when i printed i checked borderless in the printer dialog box.

Wednesday, February 10, 2010

Was playing around…

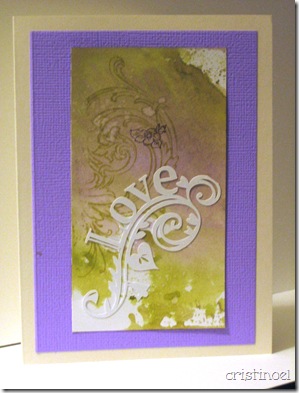
with some of the distress colors on white cardstock and came up with this. Just loved the way the colors went on this and the rest just fell into place.

card_val 001-corr_edited-1

The ‘Love’ sentiment/flourish is from Silhouette and cut 3 inches at widest points. The flourish in the background is that beautiful one from Stamper’s Anonymous and can be gotten from just about anyone selling rubber stamps. Then i had a little posy stamp  that is in the background. Kinda silly but it’s okay. Then also spritzed the background with Tattered Angels Irridescent gold Glimmer Mist before i glued the sentiment on.

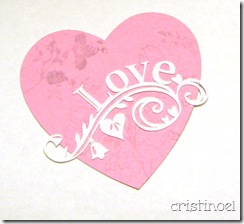
I cut 3 of these with some other pieces and one was a little smaller and i placed it on this heart from a card for one of my granddaughters for valentines day…

heart_1020-2

The heart was also cut on my Silhouette machine.